Create a New Exhibition
Before you can create an exhibition, you have to create the artist profile(s) and upload art pieces into the dashboard.
Instructions
Log into the VR-All-Art Dashboard.
In the left side panel select Exhibitions > New.
Step 1
Enter basic information about the Exhibition: title, subtitle, description (curatorial text) and time frame (the duration of the exhibition).
Likewise, upload a poster for your exhibition.
In this step only the title and subtitle fields are required information, but we strongly advise that you enter all the details as that will ensure the best experience for your virtual visitors. Of course, you can always edit your exhibition once it is successfully created.

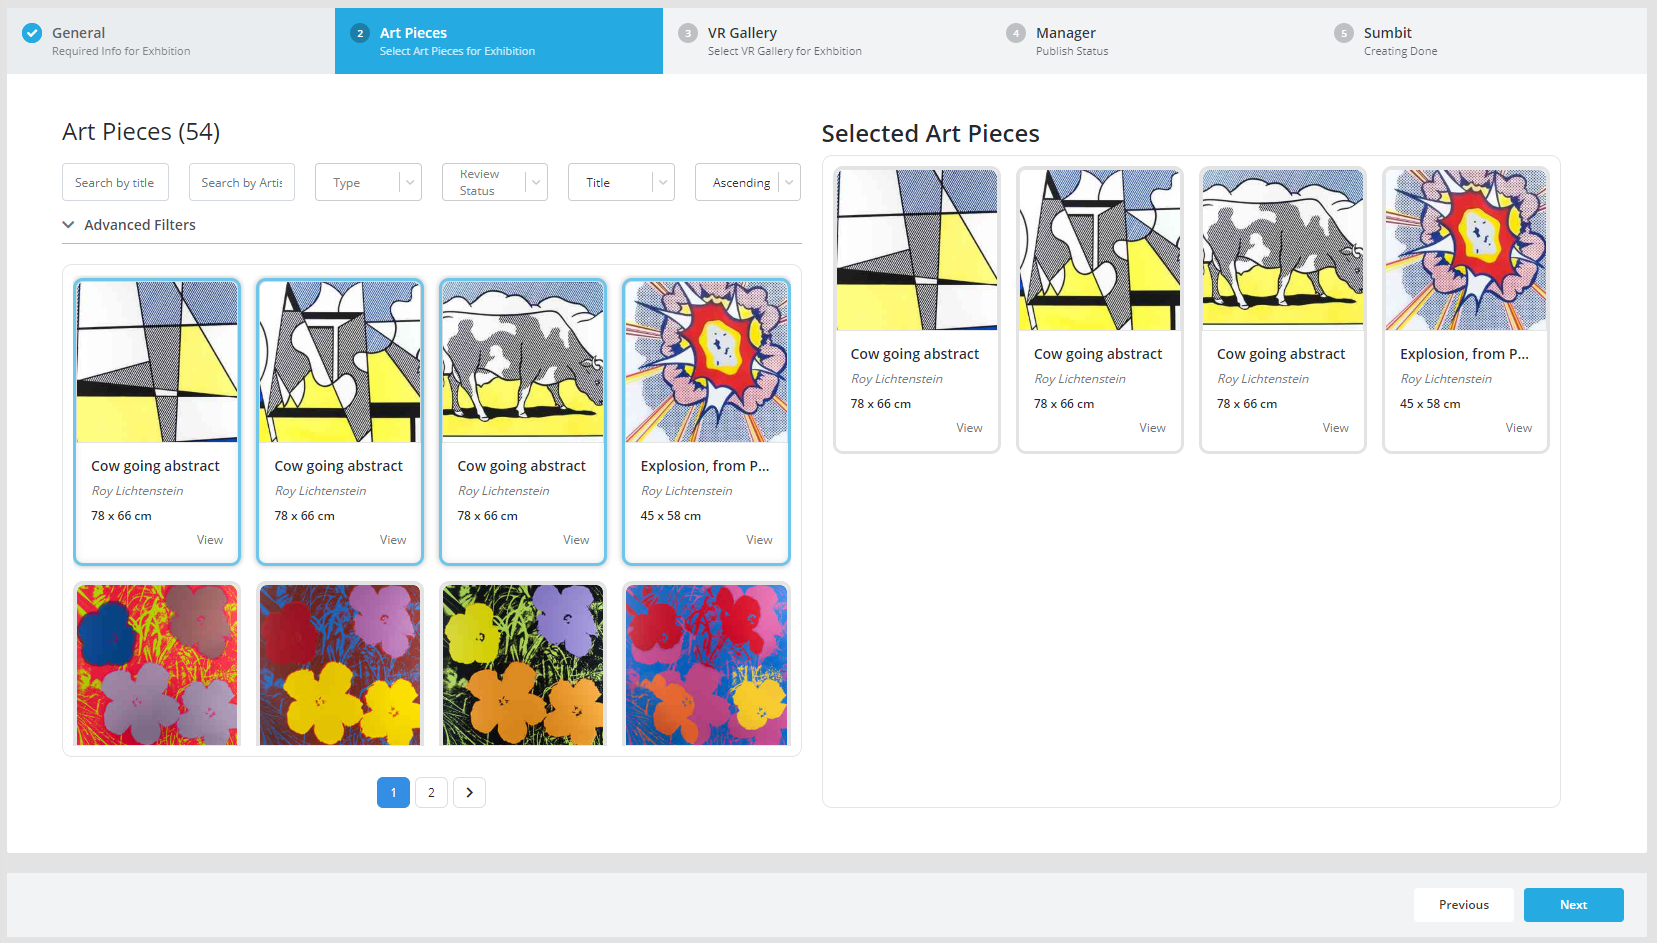
Step 2
On the left side of your screen you will see all of your art pieces. Select the artworks that you want to add to your exhibition and they will appear in the window on the right. To remove an art piece from the selected works, click on it again and it will disappear from the "Selected Art Pieces" window.
You can also sort your art pieces by titles, types and prices, as well as choose the order in which they will be sorted: ascending or descending.
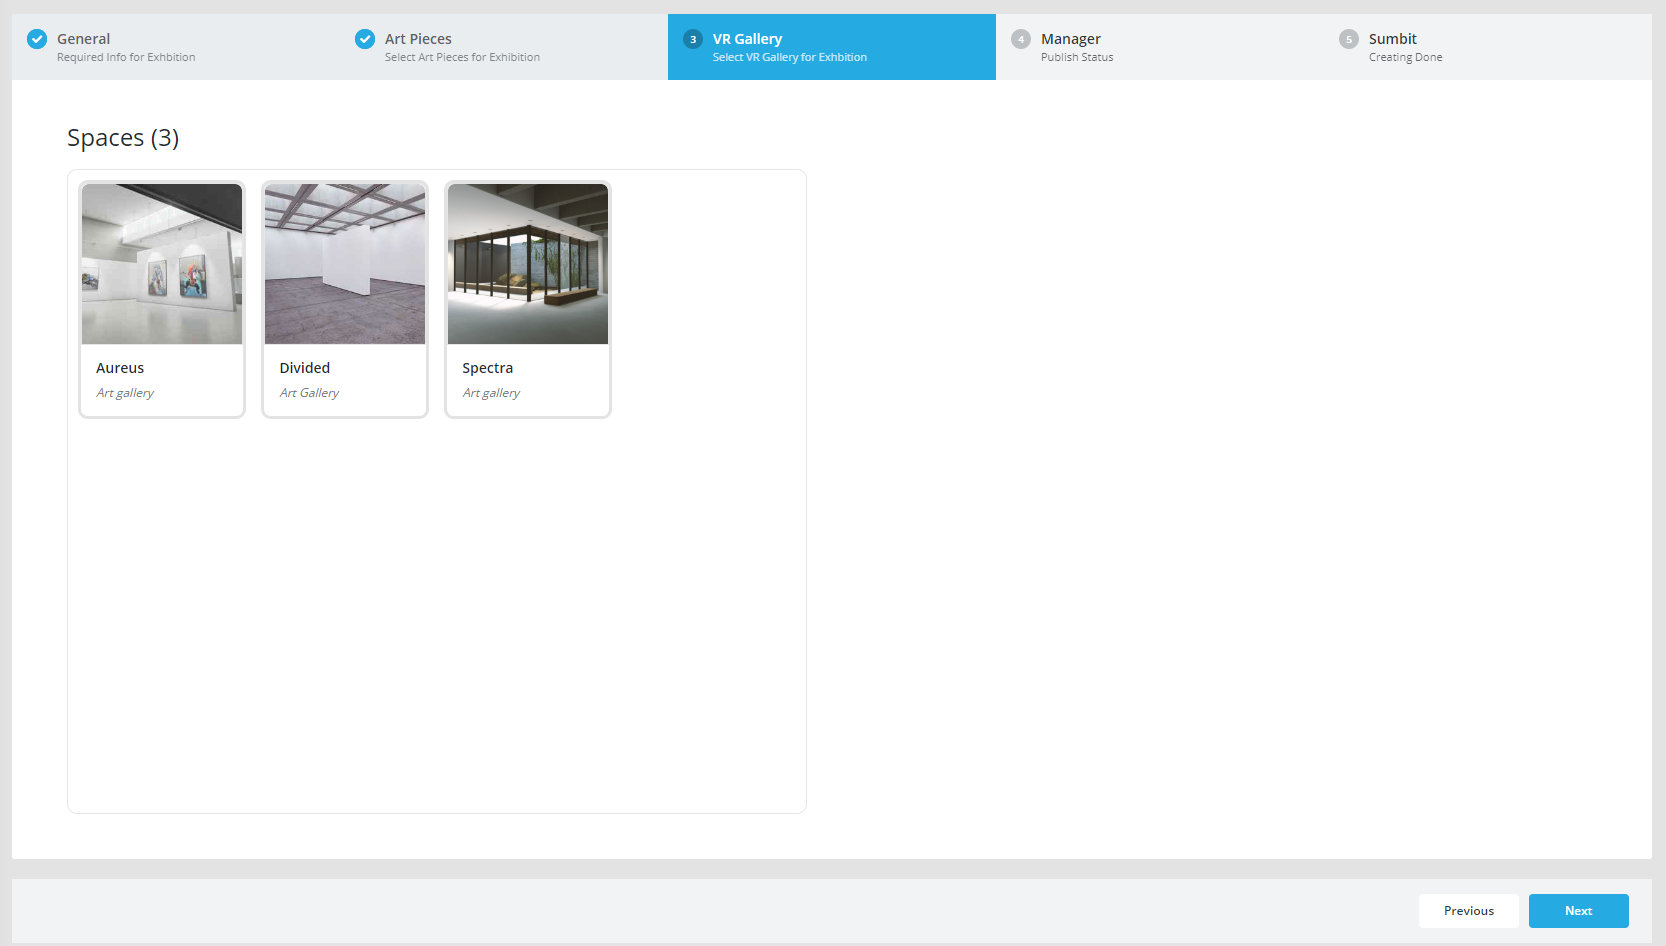
Step 3
Next, select the virtual space for your exhibition from the available VR galleries following the same principle as in Step 2.
Follow this guide to help you choose the best virtual space for your exhibition.

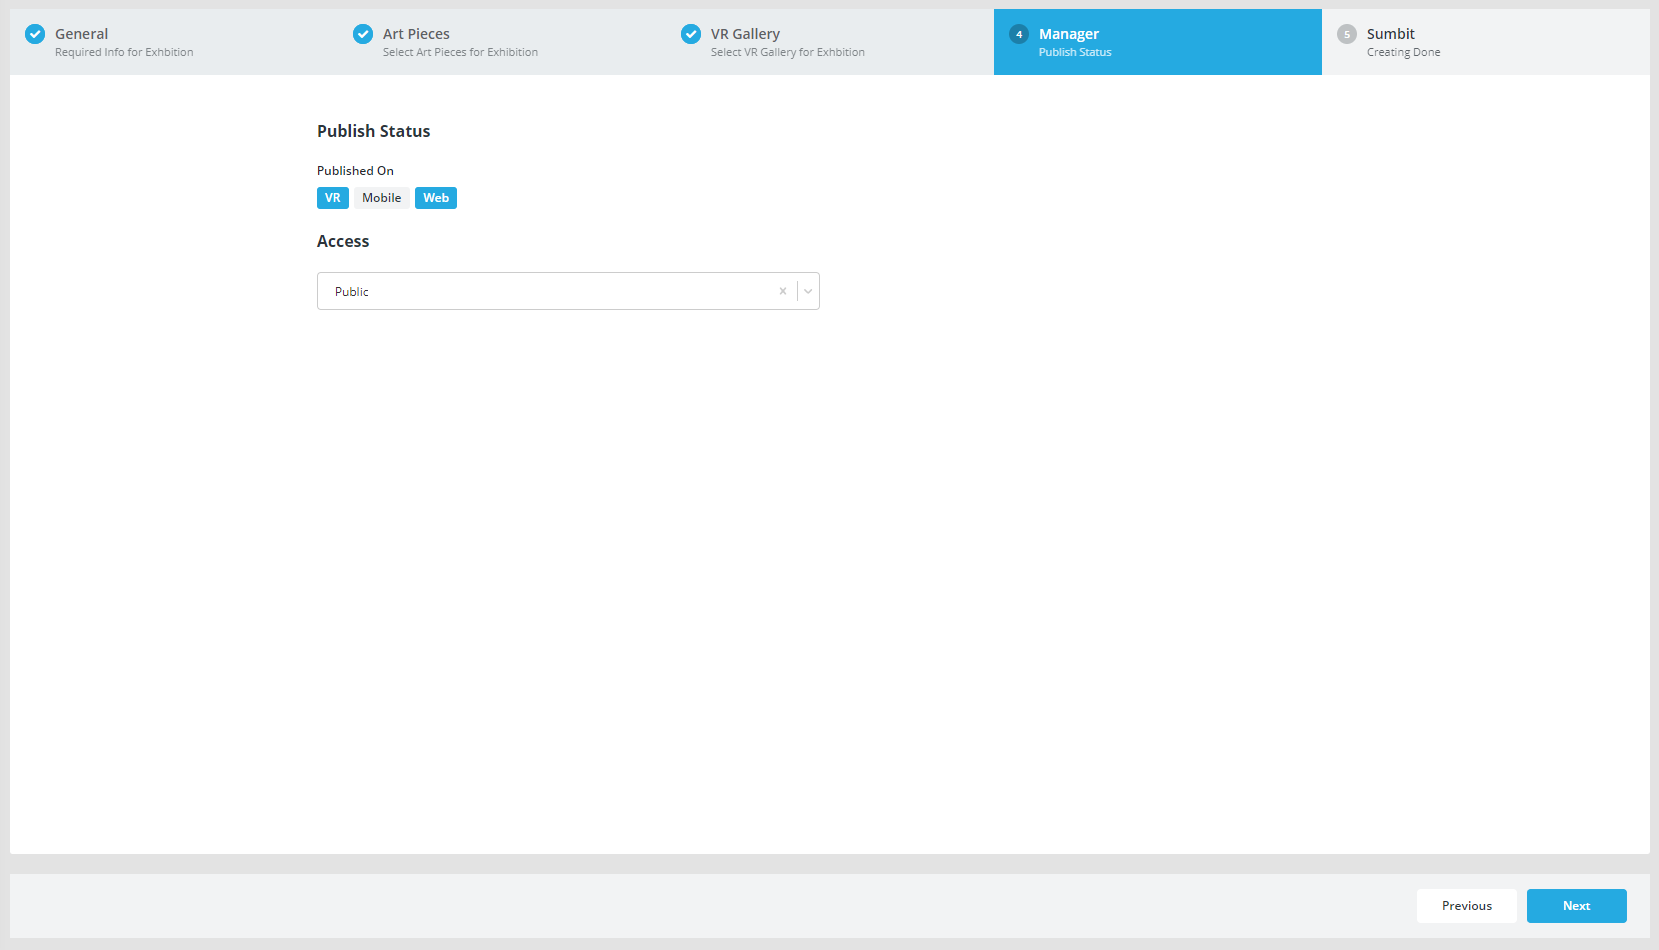
Step 4
Choose where you want your exhibition to be published and available: in Virtual Reality, on the web or in Augmented Reality (mobile). You can select one, two or all three options - so that your audience can choose which platform they prefer to use.
Likewise, decide whether you prefer to keep your exhibition "private" and share it with a select number of visitors, or make it "public" and open it to a wider audience.
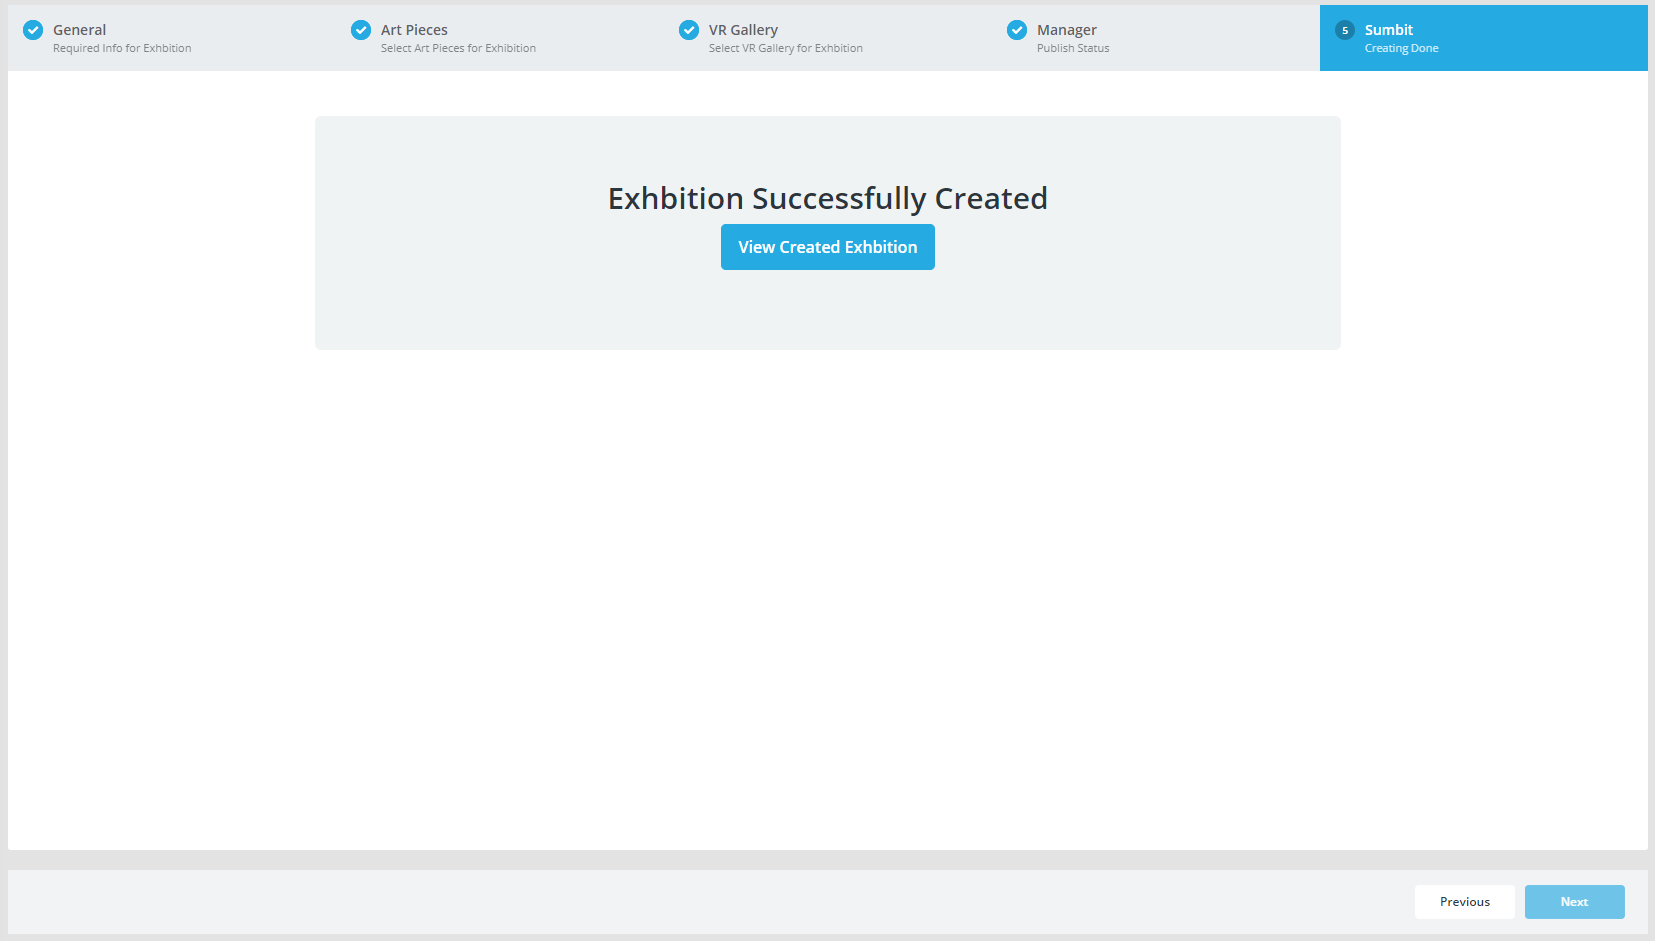
Step 5
You have successfully created a new Exhibition.
By clicking on "View Created Exhibition" you can see all of your exhibitions.